|
<< Click to Display Table of Contents >> The Print History Screen |
  
|
|
<< Click to Display Table of Contents >> The Print History Screen |
  
|
Sometimes it is useful to be able to print out a history of the songs that have been played. The EZ Play DJ provides a way to print out a list of the songs.
You may want to edit the History first, or even load it into another program for formatting. The EZ Play DJ lets you copy the history to the clipboard or to save it to a file on your PC.
If you have a mouse and keyboard attached to the computer with the EZ Play DJ, you can edit the history while it is displayed on the Print History Screen before you print it, copy it to the clipboard, or save it to a file on the PC.

Displaying the Print History Screen
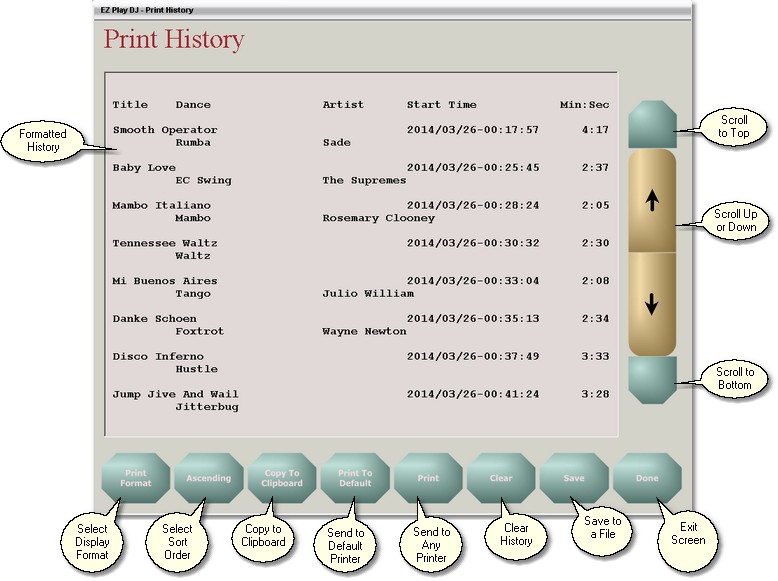
At the bottom on the Options Screen is a button with the label 'History'. Press this button and the Print History Screen will appear and will display the list of songs which have been played.
Scrolling the History Up and Down
To the right of the list of songs on the screen are two buttons with arrows. Press the button with the Up Arrow to scroll toward the top of the history, and press the button with the Down Arrow to scroll toward the bottom of the history.
Setting the Format of the Display
You may want to format the history so that it is easy to read and suitable for printing, with a page title and column headings. But if you want to import the history into another program which will be used for additional formatting, you may want to import the song titles, dance names, and other fields separated by commas, without a page title or column headings.
The EZ Play DJ will let you format the history either way. At the lower left corner of the screen is the button for setting the format. To select a format suitable for printing, press the button until the label on the button is 'Print Format'. To set the format show the fields separated by commas (CSV Format, for Comma Separated Variables), press the button until the label on the button is 'CSV'.
Changing the Sort Order
The EZ Play DJ will let you sort the history with the most recently played song at either the top or the bottom of the list. To the right of the button for setting the format is the button for setting the sort order. To select the sort order with the most recently played songs at the bottom press the button until the label on the button is 'Ascending'. To select the sort order with the most recently played songs at the top press the button until the label on the button is 'Descending'.
Copying the History to the Windows Clipboard
You can copy the history to the Windows Clipboard by pressing the button labeled 'Copy to Clipboard'. Then you can paste the history into another program.
Printing the History to the Default Printer
If you want to send the history directly to the default printer on the computer, press the button labeled 'Print to Default'.
Printing the History to Any Printer
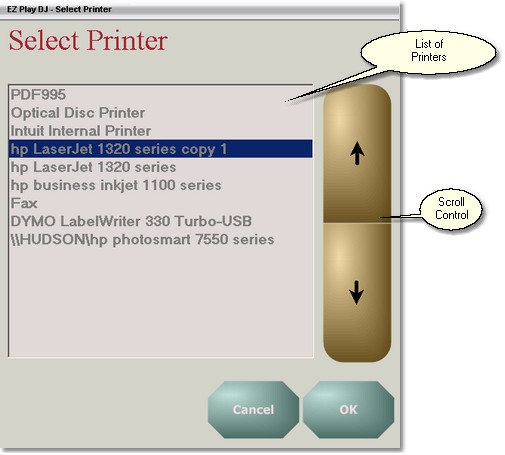
If you want to send the history directly to a printer on the computer, press the button labeled 'Print'. The Select Printer Screen will appear. Use the scroll control at the right side of the screen to select the printer you want to use, then press the 'OK' button to print the history.

Clearing the History
To clear all information from the history and start over with a blank screen press the button with the label 'Save'. You will be asked to confirm that you want to clear the history. Press 'Yes' to clear the history, and 'No' to cancel.
Saving the History to a File on the Computer
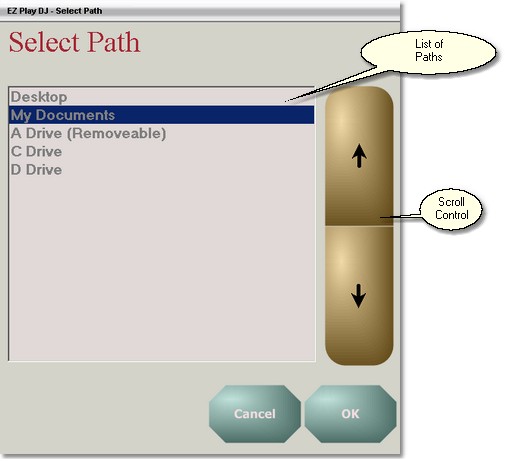
To save the history to a file on your computer, press the button with the label 'Save'. The Select Path Screen will appear. Use the scroll control at the right side of the screen to select the destination for the file, then press the 'OK' button to save the history to the file, which will be named 'History.txt'.
Available destinations for the file include Desktop, My Documents, and all fixed, removable, and network drives.

Adding Songs to Play List
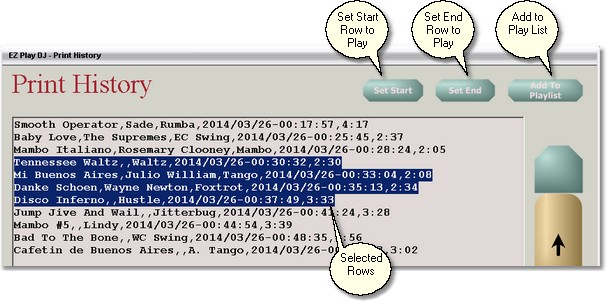
If you want to send one song or a range of songs in history to the play list on the Main Screen first display the songs in CSV Format.
Then put the mouse cursor on the line with the first song then press the button labeled 'Set Start'. If you want to select a range of songs put the mouse cursor on the line with the last song then press the button labeled 'Set End'.
Then press the button labeled 'Add to Play List' to play the songs.
